Tuesday, March 30, 2010

Roasted Vegetable Soup

I know, I know: It's March-almost-April, and it's not really "soup season" anymore. But if your weather is anything like ours here in Ohio, it's bound to change in five minutes, and you just may have a few more rainy, chilly days before it warms up for good. On one of those days, this soup is the perfect thing to make for dinner.

I'm loving roasted vegetables lately. I just love the deep, slightly charred flavor that results in roasting them. And I mean, just look how beautiful they are. How could anything so gorgeous not taste amazing?

You can use any combination of vegetables you like for this soup; asparagus would make this more spring-y, tomatoes would make it sweeter, and potatoes would make it heartier. Trust me, you don't want to wait until the fall to try this one.

Roasted Vegetable Soup

source: adapted from Pillsbury Christmas 2007

2 tablespoons olive oil or vegetable oil
1 teaspoon dried rosemary leaves, crushed
1/2 teaspoon salt
1/4 teaspoon pepper
2 cups sliced zucchini
1 red onion, halved lengthwise and chopped
1 medium red bell pepper, coarsely chopped
2 carrots, peeled and chopped
1/2 pound mushrooms, sliced
3 garlic cloves, minced
1 can vegetable broth or chicken broth
3/4 cup whipping cream
2 tablespoons chopped fresh parsley

1. Heat oven to 475 degrees. In small bowl, combine oil, rosemary, salt and pepper; mix well. Set aside. In large bowl, combine all vegetables. Add oil mixture to vegetables and mix well to coat. Place vegetables in a single layer on an ungreased cookie sheet.

2. Bake for 30 minutes or until vegetables are golden brown and tender, stirring halfway through baking time.

3. In large saucepan, combine roasted vegetables, broth, cream, and parsley; mix well. Cook and stir over medium heat for 8 to 10 minutes or until thoroughly heated and slightly thickened.

Monday, March 29, 2010

Slow Cooker Pepper Steak

I know this meal doesn't look very pretty in the picture, but trust me: This pepper steak is absolutely delicious. The meat is really flavorful and tender, and the sauce is just amazing. I used a can of crushed tomatoes instead of the whole tomatoes called for in the original recipe, but it worked out just fine. I also skipped the corn starch step, which is why my sauce is a lot thinner than it would have been otherwise. But I really liked the way the sauce soaked down into the rice and flavored it.

If you're looking for a meal that requires very little prep and almost no maintenance and results in something flavorful and satisfying, I think you'll really like this.

Slow Cooker Pepper Steak
source: Tried-and-True Cooking with Heidi

1 1/2 to 2 pounds beef top round steak
2 tablespoons canola oil

1/4 cup soy sauce

1 cup chopped onion

1 garlic clove, minced

1 teaspoon sugar

1/2 teaspoon salt

1/4 teaspoon pepper

1/4 teaspoon ground ginger

4 tomatoes, cut into eighths or 1 can (16 ounces) tomatoes with liquid, cut up (I used 1 can of crushed tomatoes)

1 large green pepper, cut into strips

1/2 cup cold water

1 tablespoon cornstarch


1. Cut beef into strips; brown in oil in a skillet. Transfer to a 3-quart slow cooker. Combine the next seven ingredients; pour over beef.

2. Cover and cook on low for 5 to 6 hours or until meat is tender. Add tomatoes and green peppers; cook on low for 1 hour longer.

3. Combine the cold water and cornstarch to make a paste; stir into liquid in slow cooker and cook on high until thickened. (I skipped this step, but would probably do this next time to make the sauce a little thicker.)

Sunday, March 28, 2010

Weekly Meal Planning, Week of 3.29.10

Well, it's finally here: the week I return to work. I go back on Friday, and I can't exactly say I'm thrilled about it. Of course, I've now come down with an awful spring cold (thank you, Ohio weather that changes every five minutes), so I should have a lot of fun during my last week off. (/sarcasm) Because of said cold, I reserve the right to skip any of these meals and lay sniveling on the couch instead, eating delivery pizza.

Monday: Roasted vegetable subs, potato chips. I've been obsessed with roasted vegetables lately and can't wait to try out this idea.

Tuesday: Chicken and cheese crescent chimichangas

Wednesday: Baked eggs and tortillas (from Everyday Food. This was on the menu last week, but we ended up having plans.)

Thursday: Beef, bean and cheese enchiladas (Wow, Mexican food three nights in a row. I just noticed that.)

Friday: Leftovers or sandwiches. This will be pretty typical on Fridays from now on for various reasons, not the least of which is that I'd like to take a break from the kitchen after a long week of work.

Saturday: Pulled BBQ beef sandwiches topped with cole slaw, potato chips. I typically make pulled pork instead of beef, but I have a roast in the freezer that I need to use up. I've been craving BBQ anything lately, especially if it's topped with cole slaw.

Sunday: It's Easter. I'm not sure exactly what our plans are, but I know we're eating somewhere, so we probably won't be hungry for any kind of substantial dinner.

Friday, March 26, 2010

Burger and Fries Friday: Open-Faced Texas Burgers

As soon as this burger popped up in my feed reader, I knew I had to try it. The flavor combination is one we love, and I thought it was an absolutely brilliant idea to nestle the saucy burger patty atop a crispy slice of Texas toast (which we also love). We did, in fact, love these burgers. They're juicy and cheesy and garlicky and a little bit spicy and slightly sweet. I loved the added dimension of flavor and texture that the garlic toast brought. I served these alongside my best batch of oven rings yet, and we both really enjoyed them.

Open-Faced Texas Burgers
source: seen on Real Mom Kitchen; originally from Simple & Delicious Magazine

Half of a small onion, finely chopped

2 small garlic cloves, minced

1/4 teaspoon dried thyme

Salt and pepper to taste

1 cup shredded colby-jack cheese, divided

1 pound ground beef

4 slices frozen garlic Texas toast

1 8-ounce can tomato sauce

1 tablespoon packed brown sugar

1 teaspoon Worcestershire sauce

1 teaspoon A.1. steak sauce


1. In a large bowl, combine the onion, garlic, thyme, salt and pepper and 1/2 cup cheese. Crumble beef over mixture and mix well. Shape into four oval patties.


2. In a large skillet, cook burgers over medium heat for 5 to 6 minutes on each side or until meat is no longer pink. Meanwhile, prepare Texas toast according to package directions.


3. Drain burgers; set aside and keep warm. Add the tomato sauce, brown sugar, Worcestershire sauce and steak sauce to the skillet. Bring to a boil; cook and stir for 1 to 2 minutes or until slightly thickened. Return burgers to skillet; turn to coat. Sprinkle with remaining cheese. Serve burgers on toast.


Thursday, March 25, 2010

Peanut Butter Brownie Cups

I think it's high time I posted something sweet here, don't you? It's been awhile. This morning I woke up with a major sweet tooth and the first thing I thought about making was these delicious peanut butter brownie cups, so they seemed like the perfect thing to write about today.

I find that sometimes the simplest things are the most delicious, don't you? That's definitely true for this dessert. These take absolutely no time at all to make, and they taste so amazing. If you are a fan of the peanut butter/chocolate combo (and really, how could you not be?), then you will definitely love these. I'm going to go make a batch of them now. In fact, I may make
two batches, because these certainly don't last long in our house.

Peanut Butter Brownie Cups

source: Stephanie Cooks


1 box of your favorite brownie mix, plus the ingredients called for on the box

24 Reese's miniature peanut butter cups


1. Preheat the oven to the temperature on the box. Mix brownies according to the directions on the box.


2. Spray a mini muffin tin with baking spray. Fill each cup three-quarters full.


3. Bake 10 minutes. Remove from oven and quickly press a peanut butter cup into each brownie. Return to oven for about 1 minute.


4. Allow to cool in the pan for about 20 minutes, then remove to a wire rack.

Wednesday, March 24, 2010

Open-Faced Chicken Parmesan Sandwiches

There actually is a piece of chicken hiding underneath all that sauce and cheese -- promise!

I love finding recipes that reinvent classics and make them more accessible for weeknight dinners. No way am I going to take the time to make a complicated chicken parmesan during the week, but taking all the basic flavors and putting them in a sandwich? That I can definitely do. And the results are absolutely delicious. This hits all the same notes as traditional chicken parmesan -- the sauce, the cheese, the breaded chicken -- but it comes together much more quickly.


The recipe just calls for "cooked" chicken cutlets, but I know I would have missed the breading if I didn't add it to the chicken. So I mixed together some seasoned bread crumbs and some parmesan cheese and an egg wash for the chicken before I pan-fried it. It didn't take that much longer than just grilling the chicken would have, and it added a lot of flavor (and probably more than a few calories, but it was worth it in this case). The spinach is a great addition to these sandwiches. This was a flavorful, quick, and delicious meal that's going directly into my regular rotation.

Open-Faced Chicken Parmesan Sandwiches
source: adapted from edible ventures, who adapted it from
So Easy, by Ellie Krieger

Half of an Italian loaf or baguette
1 cup jarred marinara sauce, divided
2 chicken cutlets
1 egg, lightly beaten
1 cup Italian-style breadcrumbs
1/4 cup plus 2 tablespoons parmesan cheese, divided
2 cups baby spinach leaves
1 cup shredded mozzarella cheese

1. Preheat broiler and line a cookie sheet with foil.

2. Combine breadcrumbs and 1/4 cup parmesan cheese in a large dish. Dip each chicken cutlet in the egg, then in the breadcrumb mixture. Cook in a small amount of olive oil in a skillet over medium high heat until chicken is cooked through and breading is golden and crispy.

3. Slice the bread in half lengthwise to make two pieces. Scoop out the bread to remove the soft inner portion. Place the bread scooped side up on the broiler tray.

4. Spoon 1/4 cup of sauce into each piece of bread. Lay a piece of chicken on top and cover with 1 cup of spinach leaves. Pour another 1/4 cup of sauce over the spinach, then sprinkle each sandwich with 1/2 cup mozzarella and 1 tablespoon parmesan.

5. Broil until spinach is wilted and cheese is bubbly and browned, 4 to 5 minutes. Serve hot.

Tuesday, March 23, 2010

Rigatoni with Chicken, Bacon and Mushrooms

This recipe comes from a high school friend of mine, who posted about having this for dinner on Facebook one day a couple of weeks ago. It sounded so good that I knew I had to try it immediately, so I asked her for the recipe, which she was happy to provide. I put it on my menu that week, and we loved it. This is seriously a restaurant-quality meal. It's so flavorful and delicious. It's the kind of meal that causes you to make indecent noises while you're eating it. I'M NOT EVEN LYING.

The original recipe called for sherry, but my friend doesn't cook with alcohol so she replaced the sherry with apple juice. I decided to do the same, since we don't have sherry in the house -- but we
do have apple juice because Andrew drinks the stuff like it's going out of style. I'd encourage you to do the same. It sounds strange, but the apple juice really works in this dish. It provides just a hint of fruity sweetness that's a nice balance to the salty bacon and the earthy mushrooms. And don't you dare skip the basil, either -- it's an absolute must that takes this dish over the top. I can't wait to make this one again.

Rigatoni with Chicken, Bacon and Mushrooms

source: adapted from a high school friend


16 ounces rigatoni

Garlic powder

Dried oregano or Italian seasoning

Salt and pepper to taste

1 pound boneless skinless chicken breast tenders, cut into bite-size pieces

3 tablespoons olive oil

4 slices bacon, chopped

1 small onion, chopped

6 button mushrooms, thinly sliced

1/2 cup chicken stock

1/2 cup apple juice

1 14.5-ounce can diced tomatoes

1/4 teaspoon crushed red pepper flakes

15 fresh basil leaves, julienned

Salt and pepper to taste

1/4 cup heavy cream

Parmesan cheese


1. Cook rigatoni in boiling salted water according to al dente. Drain and set aside.


2. Meanwhile, sprinkle chicken with garlic powder, oregano or Italian seasoning, and salt and pepper. Heat olive oil in a pan at medium-high heat. Add chicken and cook until golden brown and cooked through. Keep warm.


3. Using the same pan, cook the bacon just shy of crispy. Add mushrooms and onions and cook until onions are translucent.


4. Increase heat to high and add apple juice and chicken stock. Stir with a wooden spoon to scrape the browned bits from the bottom of the pan. Bring to a boil and let cook for 2 minutes.

5. Add tomatoes, red pepper flakes, and half of the basil; season with salt and pepper. Reduce to medium low heat and cook until the sauce begins to thicken, about 15 minutes.


6. Stir cream and remaining basil into the sauce. Transfer rigatoni to a large serving dish; top with cooked chicken and pour sauce over. Sprinkle with parmesan cheese.

Monday, March 22, 2010

Balsamic Chicken with Roasted Tomatoes

I've been actively hunting for new recipes for chicken cutlets lately. They cook up so quickly that they're perfect for weeknight meals, and if I have any requirement for dinner during the week it's that it's something FAST. When I saw this recipe in one of my cookbooks recently, it made my mouth water. We love roasted tomatoes around here, and I loved that this recipe used honey on the tomatoes to make them even sweeter.

We really liked this dish. The sweet tomatoes are a nice balance to the flavor of the balsamic vinegar, and together they make an incredible sauce for the chicken. Best of all, not only is this meal delicious and quick, it's also pretty healthy. With some simple steamed broccoli and a side of garlic and cheese orzo, this was a fast and flavorful dinner that I'll definitely make again.


Balsamic Chicken with Roasted Tomatoes
source: Cooking Light Fresh Food Fast


1 pint grape tomatoes

1 tablespoon honey

1 1/2 teaspoons olive oil

1/2 teaspoon salt, divided

4 skinless, boneless chicken breast halves

1/2 teaspoon freshly ground black pepper

Cooking spray

Balsamic vinaigrette salad spritzer


1. Preheat oven to 450 degrees.


2. Combine first 3 ingredients in a small bowl; place tomato mixture on a foil-lined cookie sheet. Bake for 12 minutes or until tomato skins burst and begin to wrinkle, stirring once. Transfer tomatoes to a bowl, scraping juices into bowl. Stir 1/4 teaspoon salt into tomato mixture.


3. Place each chicken breast half between 2 sheets of heavy-duty plastic wrap; pound to 1/4-inch thickness using a meat mallet or small heavy skillet. Sprinkle chicken evenly with 1/4 teaspoon salt and pepper.


4. Heat a large nonstick skillet over medium-high heat. Coat pan with cooking spray. Add chicken; cook 3 to 4 minutes on each side. Place chicken on individual plates; coat each breast half with 2 to 3 sprays balsamic spritzer. Spoon tomatoes evenly over chicken.

Sunday, March 21, 2010

Weekly Meal Planning, Week of 3.22.10

Monday: Southwestern chicken salad with creamy lime-cilantro dressing. I use the marinade from this post for the chicken. The salad itself is just chopped romaine hearts mixed with black beans, corn, avocado, pepper-jack cheese, and shallow-fried tortilla strips. This is by far our favorite salad, and the dressing just takes it over the top.

Tuesday: Open-faced Texas burgers, oven rings

Wednesday: Creamy black bean burritos

Thursday: Steaks, grilled asparagus, foil packet potatoes -- grilling season is back, baby!

Friday: BLTs, hash browns. Stay tuned, because I plan to share my no-fail method for perfectly chewy-crispy bacon. Mmmm...bacon...

Saturday: Baked eggs and tortillas (an Everyday Food recipe that I can't find online)

Sunday: Pork chops, herbed noodles, steamed broccoli

Friday, March 19, 2010

Baked Spaghetti with Spinach and Cheese

I've mentioned my love of casseroles before. I was attracted to this particular recipe for two reasons: It's meatless, and it's condensed soup-less, something you don't find in too many casseroles of this type. We all really enjoyed this, although it was a little bit dry for my tastes; I wanted it to be creamier. Next time I make it I'll add another cup of sour cream, and I've reflected that change below. But I will definitely make this again. It comes together very quickly, is relatively healthy, and tastes really, really good!

Baked Spaghetti with Spinach and Cheese

source: adapted from Taste of Home Cooking School's 50th Anniversary Cookbook


4 ounces whole wheat spaghetti or angel hair, broken into 2-inch pieces

1 egg

2 cups (16 ounces) sour cream

1/4 cup grated parmesan cheese

1/4 teaspoon garlic powder

Salt and pepper to taste

2 cups shredded Monterey jack cheese

1 package (10 ounces) frozen chopped spinach, thawed and well drained

1 can (2.8 ounces) french-fried onions, divided


1. Preheat the oven to 350 degrees. Cook spaghetti in salted water according to package directions. Drain.


2. Meanwhile, in a medium bowl, beat egg. Add sour cream, parmesan cheese, garlic powder, and salt and pepper to taste.


3. Add drained spaghetti to egg mixture with Monterey jack cheese, spinach, and half of the onions. Pour into a greased 2-quart baking dish.


4. Cover and bake for 30 minutes or until heated through. Top with remaining onions; bake 5 minutes longer or until onions are golden brown.

Wednesday, March 17, 2010

Chocolate Irish Cream Cake

Happy St. Patrick's Day, everyone! Today's recipe is a two-fer: it's appropriate for St. Patrick's Day due to the fact that it's loaded with Bailey's Irish Cream, and it also served as my birthday cake this year. I figured since my birthday falls so close to St. Patrick's Day, why not take advantage of that fact and make a liqueur-laden cake for myself?

This cake is absolutely fantastic. It's super moist thanks to the pudding and sour cream in the cake, and the chocolate chunks add yet another dimension of chocolaty flavor. There's Irish cream in the cake and in the frosting, so that flavor definitely comes through prominently -- especially in the frosting. I think if I made this again, I'd actually prefer it with just a simple chocolate frosting, although I am the only one who felt this way. Everyone who tried this absolutely loved it just as it was. I just felt bad for my little Andrew; he had to watch everyone else enjoy it without partaking in a slice himself.

Have a safe and happy St. Patrick's Day, everyone!

Chocolate Irish Cream Cake

source: Cooks.com

1 box dark chocolate fudge cake mix
2 4-ounce packages chocolate instant pudding

1 cup sour cream

4 eggs, slightly beaten
1 1/4 cups Irish cream liqueur, divided

1 10-ounce package chocolate chunks

1 quart heavy whipping cream


1. Preheat oven to 350 degrees. Butter and flour two cake pans.


2. Blend cake mix, 1 package of pudding, sour cream, eggs, 3/4 cup Irish cream, and chocolate chips together in a large bowl. Pour mixture into prepared cake pans and bake for 45 minutes.


3. Once cake has been removed from the oven and cooled, whip together the heavy whipping cream, 1/2 cup Irish cream, and the other package of pudding until soft peaks form. Frost cake and refrigerate until serving.

Tuesday, March 16, 2010

White Pizza Dip

As soon as I saw this recipe, I knew I had to find an excuse to try it. The problem is that I don't entertain very much, so there are very few reasons to make all of the delicious appetizers I've collected over the years. The solution? Appetizer night! Every once in a while, instead of making one big entree for dinner, I'll make a few appetizers instead. Then I toss together a quick salad, and dinner is served! It's a great way to try out new recipes that I otherwise wouldn't have the opportunity to.

I'm so glad I tried this. This white pizza dip is creamy, addictive and delicious. It comes together very quickly, and it just tastes amazingly good. We ate ours smeared on slices of crusty French bread and had leftovers for a while. When we ran out of French bread, we spread the stuff on toast, which was equally delicious. I can't wait to have another appetizer night, because I'm pretty sure I'll be making this again.

White Pizza Dip

source: seen on Style Lush; recipe from Lipton

1 envelope Lipton® Recipe Secrets® Savory Herb with Garlic Soup Mix
1 16-ounce container sour cream

1 cup ricotta cheese

1 cup shredded mozzarella cheese
1/4 cup chopped pepperoni (I used pepperoni minis, which worked perfectly for this and were so cute too)

1 loaf Italian or French bread, sliced and toasted

1. Preheat oven to 350 degrees. In shallow 1-quart casserole, combine soup mix, sour cream, ricotta cheese, 3/4 cup mozzarella cheese and pepperoni.

2. Sprinkle with remaining 1/4 cup mozzarella cheese.


3. Bake uncovered 30 minutes or until heated through. Serve with bread.

Monday, March 15, 2010

Peanut Butter and Jelly Sushi Rolls

Today's recipe isn't really a recipe at all, and it is courtesy of Patty, who introduced me to it when I was searching for a snack for my son's daycare class. Although I ultimately decided to make something else for Andrew and his friends, I knew I had to try these out. Andrew's at an age where he's still too young to tackle a whole sandwich successfully, and I thought these little rolls would make eating a sandwich less messy and more fun for him. Well, they were definitely a hit, and now he has peanut butter and jelly "sushi rolls" for lunch or a snack at least three times a week. He gives them a huge round of applause!

If you have young children or you're just young at heart, give these a try. They're so fun to make, and to eat!

Peanut Butter and Jelly Sushi Rolls
source: Allrecipes

2 tablespoons creamy peanut butter
2 tablespoons jam, jelly or preserves (pick your favorite flavor)
2 slices bread

1. Remove crusts from bread. With a rolling pin or large soup can, completely flatten bread.

2. Spread 1 tablespoon of peanut butter and 1 tablespoon of jelly on each slice of bread.

3. Roll each slice into a tight spiral. Cut each spiral into four pieces.

Sunday, March 14, 2010

Weekly Meal Planning, Week of 3.15.10

I'm posting the meal plan all quick-like today, because as soon as our babysitter gets here Joe and I are headed out for an afternoon of freedom away from the boys! Happy Birthday to me!

Monday
: Grilled roast beef sandwiches with provolone cheese and caramelized onions, baked potato wedges

Tuesday: Baked penne with broccoli and three cheeses, garlic bread

Wednesday: Pork chops with roasted garlic cream sauce, roasted potatoes, roasted asparagus (quite a roast-y meal all around)

Thursday: Tater tot casserole -- a family favorite recipe I haven't made in far too long.

Friday: White chicken enchiladas -- made these last week, they were amazing, must have them again immediately.

Saturday: We're attending a high school friend's evening wedding. Free dinner FTW!

Sunday: Baked potato eggs. Don't those look interesting? I can't wait to try them!

Friday, March 12, 2010

Slow Cooker Taco Chicken

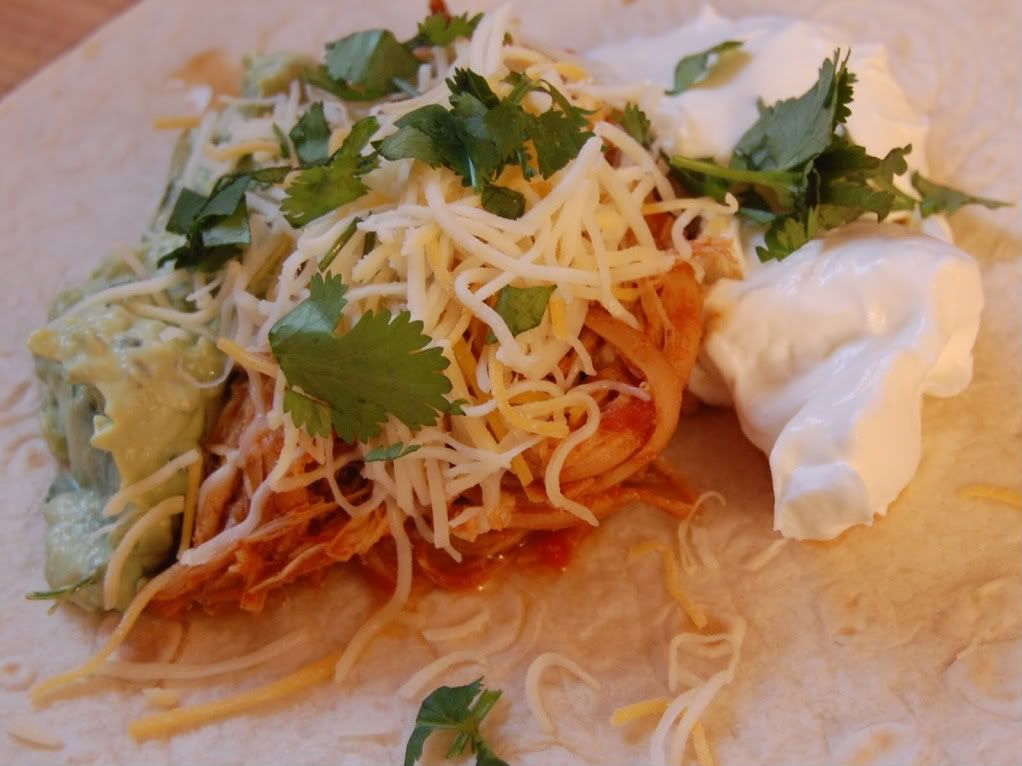
You may have noticed that I have a little problem when it comes to Mexican food. This problem is particularly evident in the photos accompanying this tortilla soup and this white chili. The problem is that, when it comes to Mexican food, I get really topping-happy. So topping-happy, in fact, that sometimes it's hard to see the actual food I'm writing about. Is there some kind of support group for sour cream and cilantro addicts? Because maybe I should start one.

So what I'm actually writing about today is the chicken you see a glimpse of in the photo, you know, there underneath all of those toppings? This recipe makes the most delicious, moist chicken taco meat I've ever had. And really, it couldn't be any easier. You just throw everything in your Crock pot and forget about it and let the delicious smell permeate your house, and a few hours later dinner is done -- just chop up your desired toppings, and you're good to go! This will be repeated a lot in our house; it's a great way to change up our typical tacos, which are usually made with ground beef.


Slow Cooker Taco Chicken
source: slightly adapted from
Krista's Kitchen

2 pounds boneless, skinless chicken breast
2 envelopes taco seasoning

1 jar salsa

Chicken broth to cover


1. Arrange chicken in the bottom of slow cooker. Add taco seasoning and salsa. Stir to coat. Pour in enough chicken broth to cover. Turn slow cooker to lowest setting and cover.


2. Remove chicken to a plate or casserole dish when it is fall-apart tender, about 5 hours. Shred meat. Return to cooking juices. Heat through. Serve with warmed tortillas.

Thursday, March 11, 2010

Broccoli Pie

My endless search (one could call it an obsession, maybe) for new vegetarian entrees has led me to lots of quiches and fritattas. I can't even tell you how many egg-based dishes I've bookmarked to try, but it is a lot. When I saw this recipe for broccoli "pie" (not technically a quiche because there's no heavy cream and not much liquid at all; not a fritatta because it has a crust), I knew we would love it, and I couldn't wait to try it.

We did love it! This comes together so easily and doesn't require much clean-up at all, and it is absolutely delicious too. I loved the creative use of packaged soup mix, which doesn't
taste like it's a mix in this recipe and really adds a lot of great flavor to this dish. Served with a simple salad and some crusty bread, this broccoli pie makes an excellent brunch, lunch or dinner.

Broccoli Pie

source: seen on My Tasty Treasures and slightly adapted from Stacey Snacks


2 cups of steamed broccoli florets

3 eggs

1 cup of whole milk
Dash hot sauce

2 cups of cheddar cheese, shredded

1 package of Lipton vegetable soup mix

1 pastry crust, rolled out and fitted into a 9-inch pie plate.


1. In a large bowl, whisk eggs, milk and hot sauce together. Add broccoli, cheese and soup mix. Pour into unbaked pastry.

2. Bake on a cookie sheet for 40 minutes at 350 degrees until top is golden. Let rest a few minutes before serving.

Tuesday, March 9, 2010

White Chili

It was a no-brainer that I was going to like this. It's a Pioneer Woman recipe, after all, and I have never been disappointed by one of her recipes. This was no exception. What I love about her food is that it is so simple; she doesn't try to fancy it up with exotic ingredients, and her food doesn't need exotic ingredients to be delicious, either. We really loved her simple, hearty, spicy, delectable white chili.

I made a few minor changes to the recipe, but nothing that really changed the overall flavor of the dish. My slightly altered version is below. We topped our servings with shredded Monterey jack cheese, sour cream, cilantro, and quick-fried tortilla strips. I'm so glad I got the chance to make this before the weather starts warming up for good and eating chili for dinner seems a little...strange.

Pioneer Woman's White Chili
source: adapted from The Pioneer Woman Cooks!

2 cups cooked chicken
1 medium onion, diced

4 cloves minced garlic

2 cans whole green chilies, chopped

1 can Great Northern beans, partially drained
4 cups (1 box) chicken stock

1 whole diced jalapeno

1 1/2 tablespoons ground cumin

Salt and white pepper to taste

1 cup whole milk

2 tablespoons cornmeal

Grated Monterey jack cheese

Sour cream, cilantro, and fried tortilla strips for garnish

1. In a Dutch oven over medium-high heat, saute onions and garlic for 2 minutes. Add chopped green chilies and jalapeno. Pour chicken broth into the pan. Add beans. Season with salt, pepper, and cumin. Place lid on pot and reduce heat to low.

2. Mix milk with cornmeal and pour into the chili. Cook for an additional 10 minutes to thicken. Check seasoning and adjust as needed.

3. Add some Monterey jack cheese to the pot and stir to melt.

4. Serve chili in a bowl. Garnish with cilantro, sour cream, extra cheese, and tortilla strips.

Monday, March 8, 2010

Baked Potato Wedges

I have been searching for a good recipe for crispy oven fries for a long time now, and within the span of a couple of days, two recipes showed up in my reader. I couldn't wait to try one of them to go with our jalapeno popper burgers. I'm so sick of frozen French fries; no matter what I do, I just can't seem to get them crispy. Ditto with every recipe I've tried using fresh potatoes; they always come out soggy. Both Annie's and Deseree's recipes promised to be crispy, and I decided to try Deseree's first. I was intrigued by the use of flour on the potatoes -- something I'd never seen before.

My search for a crispy oven fry is officially over! These turned out exactly like I'd hoped they would -- crispy on the outside, pillowy and fluffy on the inside. Even Joe, who loves crispy fries and will accept no substitutes, loved these. I used black pepper instead of cayenne because Andrew was eating these too, but I'm sure they'd be even more delicious with the cayenne. I think I'm going to be finding lots of excuses to make burgers from now on, just so I can put these on our menu over and over again.

Baked Potato Wedges
source: adapted from Life's Ambrosia

Non-stick spray

1 tablespoon butter, melted

1 tablespoon olive oil

3 russet potatoes, peeled and cut into 6 to 8 wedges each

1 teaspoon seasoning salt

2 tablespoons all purpose flour

1/4 teaspoon black pepper


1. Preheat oven to 400 degrees. Spray a baking sheet with non-stick spray and set aside.


2. Mix butter and olive oil in a bowl. Brush mixture onto the potatoes.


3. Combine seasoning salt, flour and pepper in a resealable plastic bag. Add potatoes to bag and shake to coat.


4. Bake on prepared cookie sheet for 20 minutes. Turn and bake for 10 more minutes.


5. Turn on the broiler and broil for 5 to 7 more minutes or until browned. Serve hot.

Sunday, March 7, 2010

Weekly Meal Planning, Week of 3.8.10

This is a very big week for me: Next Sunday is my 27th birthday! With that in mind, I'm continuing my tradition of making my own birthday cake (I know, I know, but my husband doesn't have time to make me one and homemade is so much better than store-bought), but I have no idea what kind I want this year. Would you guys please leave me your favorite cake recipes in the comments? I am seriously feeling uninspired, and I want to celebrate my birthday in style!

Okay, on to the meal plan. I'm making an effort to be much more budget-conscious this week (and every week from now on) due to the fact that I go back to work at the beginning of April and we'll be
doubling our weekly daycare costs. I can't promise you won't see Hamburger Helper and Pasta-Roni pop up on my menus once in a while. I'm going to try not to let that bother me.

You may have noticed that I've been using my slow cooker every Saturday. Due to my husband's work schedule, I have to solo parent the boys every Saturday, and the last thing I want to do at the end of such an exhausting day every week is make dinner. (And yes, I know that stay-at-home-moms do this very thing, all day every day, and to them I say: YOU ARE AMAZING.) It's much easier to prepare a slow cooker meal in the morning when my husband gets home from work, and then dinner is done by the time evening rolls around. I want to build my repertoire of slow cooker recipes, too, because I have a feeling I'll be using it a lot more than once a week when I go back to work.


And look: no red meat this week! I'm anxious to see if Joe notices. If he doesn't, I might try to do this more often.


Monday
:
BLT salad with buttermilk dressing (I'll probably add chicken to make this more dinner-y)

Tuesday
:
Cauliflower pie with potato crust, salad

Wednesday
:
Cheesy chicken lasagna, salad

Thursday
:
White chicken enchiladas

Friday
: Sesame-ginger chicken, bean sprouts, steamed Asian vegetables


Saturday: Slow cooker macaroni and cheese, broccoli

Sunday: It's my birthday! Joe and I are having dinner out and seeing a movie to celebrate -- probably Alice in Wonderland, which looks amazing!

Friday, March 5, 2010

Burger and Fries Friday: Jalapeno Popper Burgers

I love ordering jalapeno poppers in restaurants. I love the spicy creaminess of them. But they're a little bit labor-intensive to make at home, and I don't have much spare time to cook these days, so when I get a craving for them I have three choices: 1.) Go out to eat at a restaurant that serves them (not so easy with an almost two-year-old and a two-month-old); 2.) Opt for the frozen variety (not nearly as tasty); or 3.) Use those flavors in another dish in a new and creative way. Previously I made jalapeno popper stuffed chicken, which was delicious and to this day is one of the most popular recipes on my blog. But I'm always looking for other ways to combine those flavors.

Not long ago I came across this recipe for jalapeno cream cheese burgers, and I knew I wanted to try my own version of them immediately. I added cheddar cheese and bacon to mine to make them a little bit more jalapeno popper-ish, and my new favorite burger was born. Joe and I both really liked these. They'd also be delicious with all of the toppings (cream cheese, jalapenos, cheddar cheese and bacon) stuffed inside the burgers. I may try that next time, actually.

The burgers have a wonderful salty-spicy flavor due to the fact that they're cooked in bacon grease that has also been used to quick-saute the jalapeno peppers. The sweetness of the cream cheese is a nice compliment to all that spicy smokiness. Definitely give these a try! And come back on Monday, when I'll share the delicious oven fries I made to go with these. Let me just say, my search for a crispy oven fry is officially OVER!


Jalapeno Popper Burgers
source: inspired by Sweet Tea in Texas

4 strips bacon
2 jalapeno peppers, stems discarded, sliced thin (keep the seeds for more heat)
2 pre-shaped hamburger patties
2 teaspoons Worcestershire sauce
2 tablespoons butter
Garlic powder
2 hamburger buns, split
2 slices cheddar cheese
2 tablespoons cream cheese

1. Fry bacon until desired crispiness; set aside on paper towels to drain. Using the same skillet, saute the jalapeno peppers just until softened, about 2 minutes. Set aside.

2. In the same skillet, cook hamburgers to desired doneness; top each burger with a teaspoon of Worcestershire sauce (be sure to stand back when you do this; it may splatter).

3. While burgers are cooking, prepare the buns. Spread each bun with a tablespoon of butter and a sprinkling of garlic powder. Broil until toasted. Slather 1 tablespoon cream cheese on the top half of each bun.

4. Top bun bottoms with cheddar cheese, burgers, bacon, and jalapeno peppers.

Thursday, March 4, 2010

Dr. Seuss-Inspired Cupcakes

This isn't even really a recipe, but I wanted to share these cupcakes with you anyway because they were so much fun to make. Dr. Seuss's birthday was earlier this week, and my son's daycare is celebrating by having a Seuss-themed week. This is right up Andrew's alley, because he loves Dr. Seuss books and is steadily building his library. His favorite by far is The Foot Book, which he got for Christmas last year (and as a matter of fact, we actually read it about 12 times this morning). We're even considering doing a Seuss-themed big boy room for him.

This happened to be my week to make a snack for Andrew's class, and I knew I had to do something Seuss-related. I decided on cupcakes, but most of the recipes I saw on the internet were really fancy and high-maintenance. I considered doing something related to The Foot Book, but something about cupcakes and feet together just sounded unappetizing to me. Finally I decided to make some One Fish, Two Fish, Red Fish, Blue Fish-themed cupcakes. The fish look nothing like Dr. Seuss's, but I don't think Andrew and his friends will care.

The fish were made with writing icing I bought in the baking aisle, and it was so easy to work with. It dried hard, a lot like royal icing. I think Andrew and his friends are going to love these!

Dr. Seuss-Inspired Cupcakes

1 box funfetti cake mix
Water, oil and eggs called for on cake mix
1 container classic white frosting
Yellow, green, red and blue writing icing
Black decorating gel

1. Prepare cake mix as directed and bake according to cupcake instructions on box. Cool.

2. Frost cupcakes. Using writing icing, pipe fish shapes onto cupcakes and fill in completely. Use black decorating gel for eyes.

Wednesday, March 3, 2010

Toasted Ravioli with Roasted Red Pepper Sauce

Okay, so I know that technically fried ravioli is supposed to be an appetizer, but who says you can't have it for dinner? That's exactly how we ate this, served on a bed of baby spinach dressed with a splash of red wine vinegar, and it was a delicious, hearty meal. And really pretty too -- look at all those vivid colors!

There is nothing not to like about this meal. Not a single thing. The fried ravioli are crispy little pillows of deliciousness, and the roasted red pepper sauce is sweet and spicy at the same time -- the perfect balance of flavors. This could easily be turned into an appetizer -- just use the sauce for dunking instead. This was a great vegetarian dinner, and it gets a big thumbs up from all three of us!


Toasted Ravioli with Roasted Red Pepper Sauce

source: adapted from edible ventures, who adapted it from
Rachael Ray's Book of 10

2 eggs
Splash of milk
Salt and freshly ground pepper
1 1/2 cups Italian-style bread crumbs
1/4 cup grated parmesan cheese
1 package large fresh cheese ravioli (or half a package of small, which is what I used)
5 tablespoons extra virgin olive oil, divided
3 garlic cloves, finely chopped
Pinch of red pepper flakes
3 roasted red peppers, drained
1 8-ounce can of tomato sauce

1. Beat eggs and the splash of milk in a shallow bowl. Season with salt and pepper. Combine bread crumbs with cheese in a second dish. Dip the ravioli into the eggs, then coat with bread crumbs.

2. Heat 3 tablespoons of oil over medium heat in a large skillet, and toast the ravioli until deep golden, about 4 minutes per side.

3. In a small saucepan, heat remaining 2 tablespoons of oil with the garlic and red pepper flakes over medium-low heat. Grind the roasted red peppers in a food processor and add them to the pot after cooking the garlic for a couple of minutes. Stir in the tomato sauce and season with salt and pepper. Heat through.

4. Serve toasted ravioli with the dipping sauce, either on the side or on top.

Tuesday, March 2, 2010

Candied Bacon Chocolate Chunk Cookies

First of all, please tell me you appreciate the humor of the pig in the photo. Special thanks to my son for letting me borrow one of his (many) farm books expressly for this purpose.

I knew I wanted to try this recipe as soon as I saw it in my reader. I've been intrigued by the chocolate-bacon pairing for a while and have just been waiting for the perfect recipe to try. If you think putting bacon in a cookie sounds weird or gross, I think you'll be pleasantly surprised! The bacon adds a nice smokiness to the cookies, but it doesn't make them overwhelmingly porky. The bacon flavor is really subtle, and the saltiness works perfectly with the chocolate. Typically I like a cakey chocolate chip cookie, but I really enjoyed this crispier version for these cookies. It complimented the crispiness of the bacon nicely, so the bacon sort of just melded into the cookie.

If I'm being honest, I almost didn't make these after I sampled the brown sugar-coated bacon on its own. It was so good that I could have just eaten that and been a very happy girl. But because I have some serious will-power, I forged ahead with the cookies, and I'm glad I did. They're so different and delicious. And Joe loved them; combining two of his favorite things, chocolate chip cookies and pork fat, they are pretty much the perfect man food.

Candied Bacon Chocolate Chunk Cookies
source: Sticky Gooey Creamy Chewy

1/2 cup granulated sugar

1/2 cup firmly packed light brown sugar

8 tablespoons (1 stick) unsalted butter, cold, cut into 1/2-inch pieces

1 large egg

1 teaspoon vanilla extract

1/2 teaspoon baking soda

1 1/4 cups all-purpose flour

1 cup semisweet chocolate chunks or chips

1 cup candied bacon bits (recipe follows)

1. Preheat oven to 325 degrees. Line three baking sheets with a silicone liner or parchment paper.

2. Beat the sugars and butter together until smooth. Mix in the egg, vanilla, and baking soda. Whisk together the flour and salt, then sift them into the batter. Stir in the chocolate chunks and bacon bits.

3. Using a small cookie scoop or a teaspoon, scoop the cookie dough into small balls, about 1 inch in diameter, and place them 2 inches apart on each of the baking sheets.

4. Bake for 14 to 16 minutes, or until pale golden brown. Rotate sheets halfway through baking for even browning. Remove from the oven and cool on a wire rack. Makes about 3 dozen 2-inch cookies.

Candied Bacon Bits

8 strips bacon
1/2 cup light brown sugar

1. Preheat oven to 400 degrees.

2. Lay the strips of bacon on a baking sheet lined with a silicone mat or aluminum foil, shiny side down.

3. Sprinkle half of the brown sugar evenly over each strip of bacon.

4. Bake for about 15 minutes. (Mine definitely took longer to get crispy -- probably about 20 minutes.) Midway during baking, flip the bacon strips over and drag them through the dark, syrupy liquid that’s collected on the baking sheet. Add the rest of the brown sugar and continue to bake until a deep mahogany color. Remove from oven and cool the strips on a wire rack.

5. Once crisp and cooled, chop into little pieces, about the size of grains of rice. Candied bacon bits can be stored in an airtight container and chilled for a day or so, or stored in the freezer a few weeks ahead.

Monday, March 1, 2010

Shrimp Pot Pies

I don't like watching the Food Network nearly as much as I used to. I'm not a fan of a lot of the new personalities on the channel. That being said, however, it's still my channel of choice for background noise during the day.

One day a few weeks ago, I happened to catch an episode of Cooking for Real with Sunny Anderson. She was making individual shrimp pot pies, and they looked and sounded so good that I just had to give them a try. And I am really, really glad I did. This meal skyrocketed right to the top of my favorite meals, ever. These shrimp pot pies are so incredibly delicious. The filling is rich and creamy and spicy and sweet and just...oh. So good.
I can't adequately do them justice, so you'll just have to go make them yourself. Seriously. MAKE THEM. I guarantee that you will love them.

Sunny made her own puff pastry shells, but that was a little bit too fussy for me, so I'd planned on buying the pre-made shells for this recipe. However, my grocery store apparently doesn't carry the pre-made shells, so I had to improvise further. I cut one sheet of puff pastry into fourths, baked them, and then halved them and put the filling inside. They probably didn't look as pretty as Sunny's, but they were a lot easier to assemble.

If you make no other recipe on my blog, please, I beg you, make this one. These shrimp pot pies are one of the best things I have ever made. We all loved them, and I think they're well on their way to becoming a family favorite.

Shrimp Pot Pies
source: adapted from Food Network


1 egg

1 sheet puff pastry, thawed

Flour, for dusting

1 package frozen medium shrimp (buy them shelled and deveined)

1/4 teaspoon cayenne pepper
1 tablespoon olive oil

2 tablespoons unsalted butter

1 small onion, chopped

1 small carrot, diced

1 celery stalk, diced

1 small can mushrooms, drained

2 cloves minced garlic

2 sprigs fresh thyme

1/2 cup white wine

2 cups heavy cream

Salt and white pepper

1. Preheat oven to 400 degrees.

2. In a small bowl, whisk egg and water until well blended. Lightly dust work surface with flour. Unfold puff pastry, roll with a rolling pin to remove creases, and cut into fourths. Brush each piece with egg wash and bake in the middle of the oven until golden, about 20 minutes. Remove from oven and gently halve each pastry with a bread knife.

3. Meanwhile, season the shrimp with cayenne pepper, salt and black pepper. In a medium saucepan over medium-high heat, add oil and 1 tablespoon butter. Saute the shrimp, 1 minute per side. Remove shrimp and set aside.

4. Add remaining butter to the pan and saute onions, carrots, celery, mushrooms, and thyme, until softened about 10 minutes. Add garlic; cook and stir 30 seconds. Add wine, bring to a simmer and cook until most of the wine has evaporated. Add the cream and bring back to a simmer until the sauce thickens to a gravy consistency, about 12 to 15 minutes.

5. Place the shrimp back into the sauce to coat. Remove thyme and season with salt and white pepper. Ladle the shrimp mixture onto the bottom halves of the puff pastry; top with other halves.